note
monitor
監控
自動化控制所有虛擬機在職場上作用非常大,下列是常會用到的套件:
nagios, zabbix, prometheus
這些軟體通常會有伺服器端(監控伺服器)和客戶端(被監控的電腦)
-
被監控的機器不需要安裝客戶端,只需要透過外在測試和觀察,就可以監控
-
安裝客戶端虛擬機定時監控磁碟使用、CPU loading,有兩種客戶端和伺服器端的傳遞方式
- passive: 客戶端先存資料在本地端,server定時拿取資料
- active: 客戶端自動把資料給server
有時候會有proxy,很多機器先給proxy,然後server再去跟proxy要資料
當有事情發生了(CPU不足、磁碟過載…),用自動化的方式傳送email或是Line到負責人那裏
架設伺服器端
如果沒有做以下設定,很容易當作垃圾信
申請密碼: google application,選擇應用,然後點其他,打上隨便一個內容後按下生成就會拿到密碼
vim /etc/mail.rc
使用G移動到最下面,然後在末尾加上下列文字
set smtp-use-starttls
set ssl-verify=ignore
set nss-config-dir=/etc/pki/nssdb/
set from=[your email]
set smtp=smtp://smtp.gmail.com:587
set smtp-auth-user=[your email]
set smtp-auth-password=[google application passwd]
set smtp-auth=login
e.g.
set smtp-use-starttls
set ssl-verify=ignore
set nss-config-dir=/etc/pki/nssdb/
set from=ericjjkkhandsome@gmail.com
set smtp=smtp://smtp.gmail.com:587
set smtp-auth-user=ericjjkkhandsome@gmail.com
set smtp-auth-password=fnneeoycydyaqlsh
set smtp-auth=login
$ echo "hello world" | mail -v -s "Test1234" [測試信箱]
$ echo "hello world" | mail -v -s "Test1234" s110910541@student.nqu.edu.tw
Zabbix
使用zabbix做監控系統,我們會使用到三台虛擬機
https://cloud.tencent.com/developer/article/1943154
$ sudo yum install mariadb-server mariadb -y
set up db
db
設定root密碼,除了設定root外,其他選項Disallow root和Remove test選n,其他都Enter跳過
$ mysql_secure_installation
登入db
$ mysql -u root -p
$ create database zabbix_db character set utf8 collate utf8_bin;
$ create user zabbix@localhost identified by 'centos';  # 設定密碼為centos
$ grant all privileges on zabbix_db.* to zabbix@localhost;  # 讓zabbix使用zabbix_db全部權限
$ quit;
install zabbix
到zabbix官網下載5.0LTS centos7的版本,官網的指令如下
$ rpm -Uvh https://repo.zabbix.com/zabbix/5.0/rhel/7/x86_64/zabbix-release-5.0-1.el7.noarch.rpm
$ yum clean all
$ yum install zabbix-server-mysql zabbix-agent -y
$ yum install centos-release-scl -y
$ vim /etc/yum.repos.d/zabbix.repo
把enable改成1
[zabbix-frontend]
...
enabled=1
...
安裝前端軟體
$ yum install zabbix-web-mysql-scl zabbix-apache-conf-scl -y
導入zabbix數據,並輸入剛剛設定的密碼centos
$ zcat /usr/share/doc/zabbix-server-mysql*/create.sql.gz | mysql -uzabbix -p zabbix_db
修改帳號密碼
$ vim /etc/zabbix/zabbix_server.conf
新增DBPassword和修改DBName
DBName=zabbix_db
DBUser=zabbix
DBPassword=centos
修改時區
$ vim /etc/opt/rh/rh-php72/php-fpm.d/zabbix.conf
設定時區必須要把前面的分號拿掉!
php_value[date.timezone] = Asia/Taipei
重啟zabbix
$ systemctl restart zabbix-server zabbix-agent httpd rh-php72-php-fpm
$ systemctl enable zabbix-server zabbix-agent httpd rh-php72-php-fpm
set up zabbix website
開啟http://192.168.42.131/zabbix/setup.php (http://[ip]/zabbix),就可以看到zabbix的主頁面了
在確認所有功能都OK,就填入必要資訊
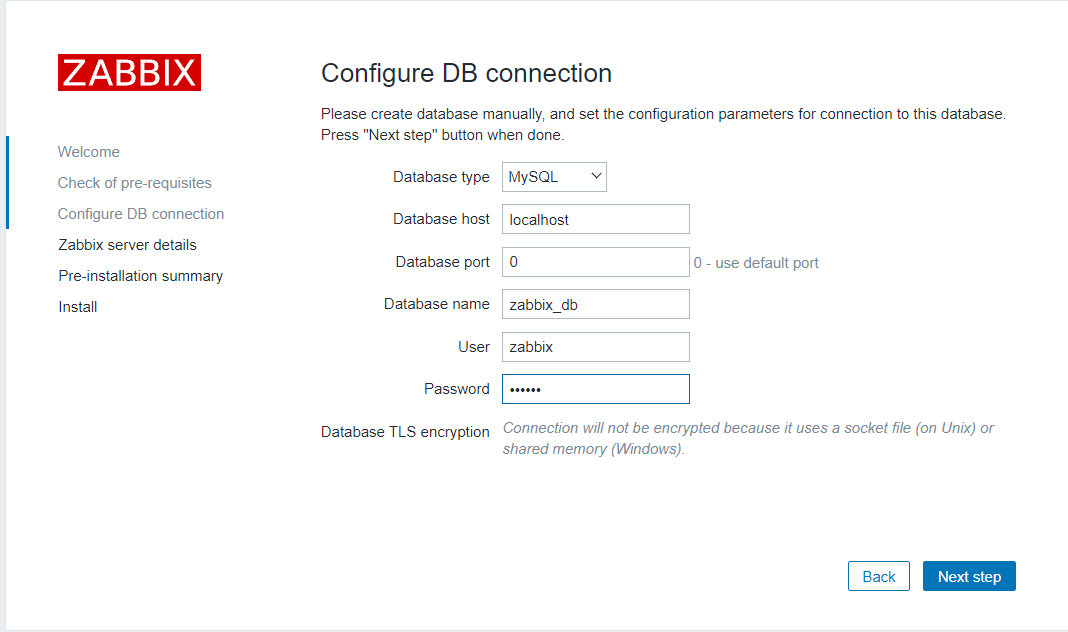
後面的步驟,直接使用默認的就OK了,按下next step直到結束
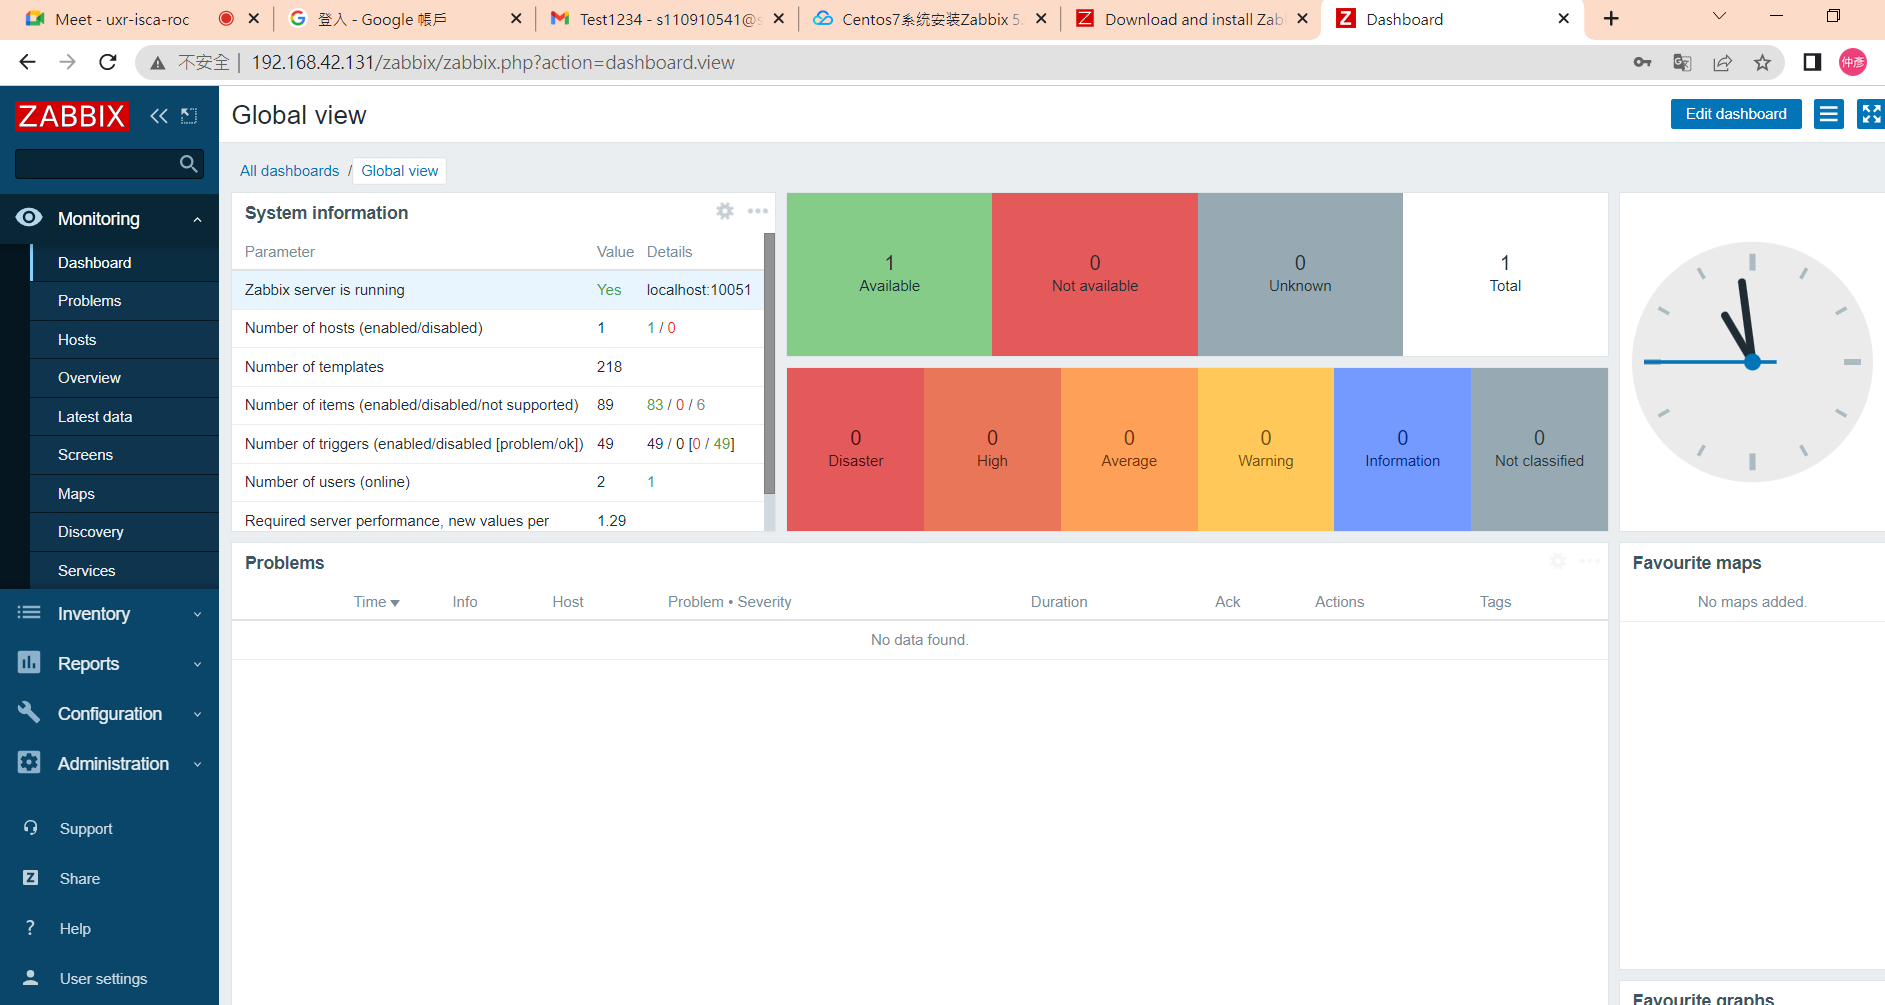
登入使用默認帳號: Admin, 密碼: zabbix,成功就可以進到下面的介面
架設客戶端
https://computingforgeeks.com/install-and-configure-zabbix-agent-on-centos/
install zabbix client
安裝zabbix到兩台client上
$ sudo yum install https://repo.zabbix.com/zabbix/5.0/rhel/7/x86_64/zabbix-release-$ 5.0-1.el7.noarch.rpm -y
$ sudo yum install vim zabbix-agent zabbix-sender -y
$ sudo vim /etc/zabbix/zabbix_agentd.conf
下面三個選項作修改
Server=[伺服器IP]
ServerActive=[伺服器IP]
Hostname=[自己主機叫做什麼就改成什麼]
e.g
Server=192.168.42.131
ServerActive=192.168.42.131
Hostname=test
$ sudo systemctl start zabbix-agent
$ sudo systemctl enable zabbix-agent
$ sudo systemctl status zabbix-agent
查看有沒有運作
$ netstat -tunlp | grep zabbix
設定伺服器端的客戶端連線
伺服器端設定要連線的client端
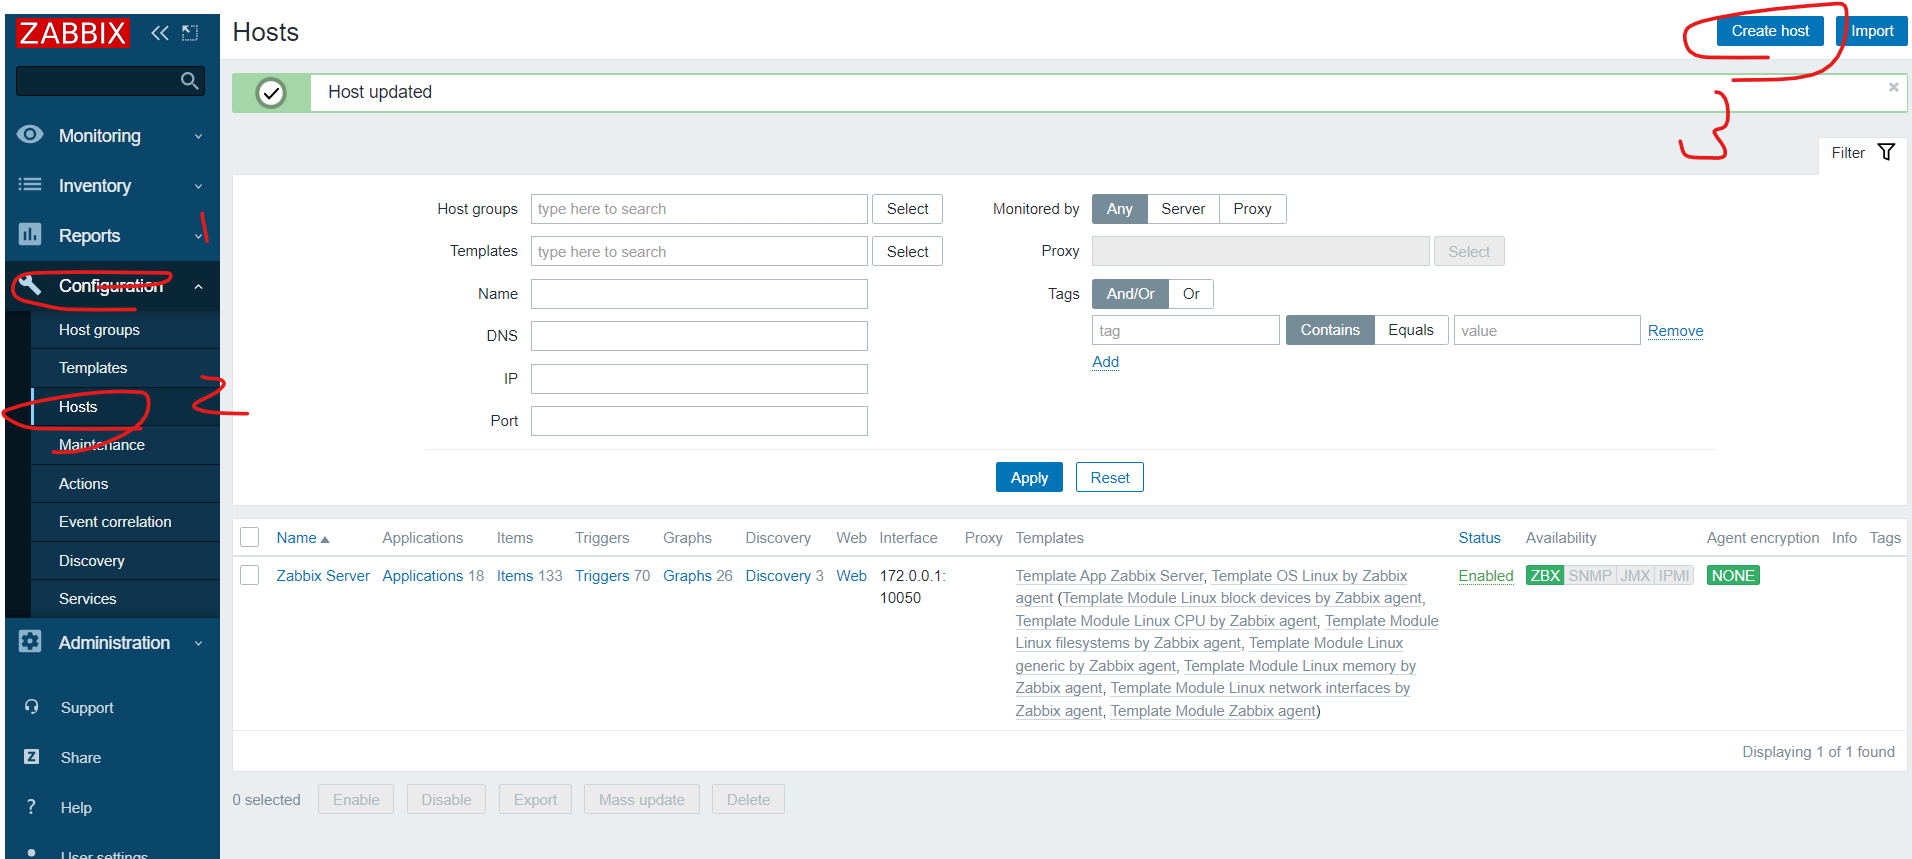
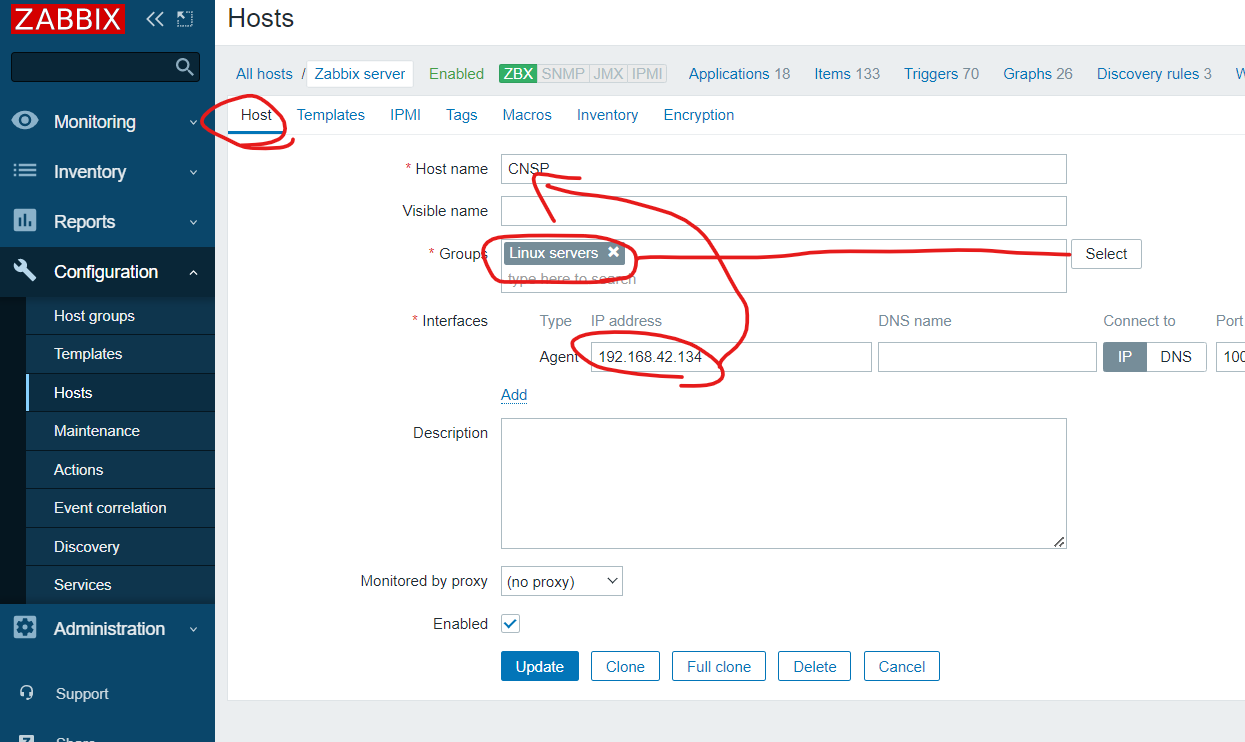
然後點選update
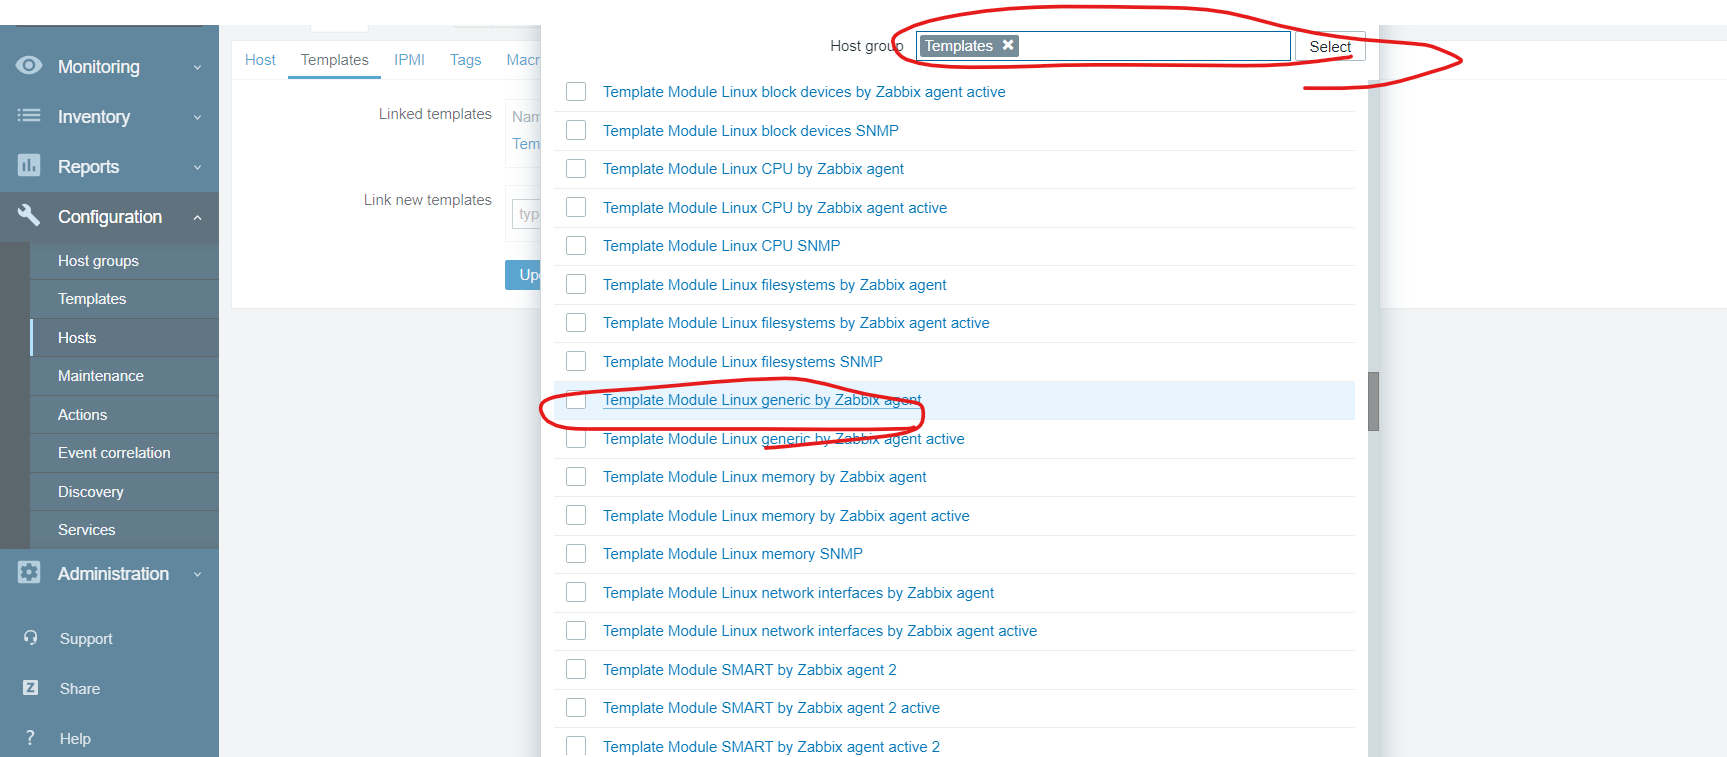
use template
選取要使用的模板模板,加入到設定裡面
完成後會看到下圖
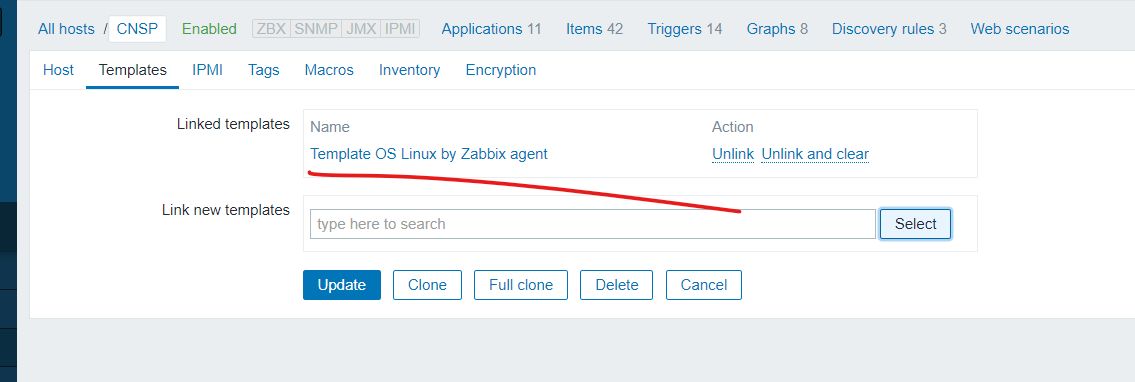
test client
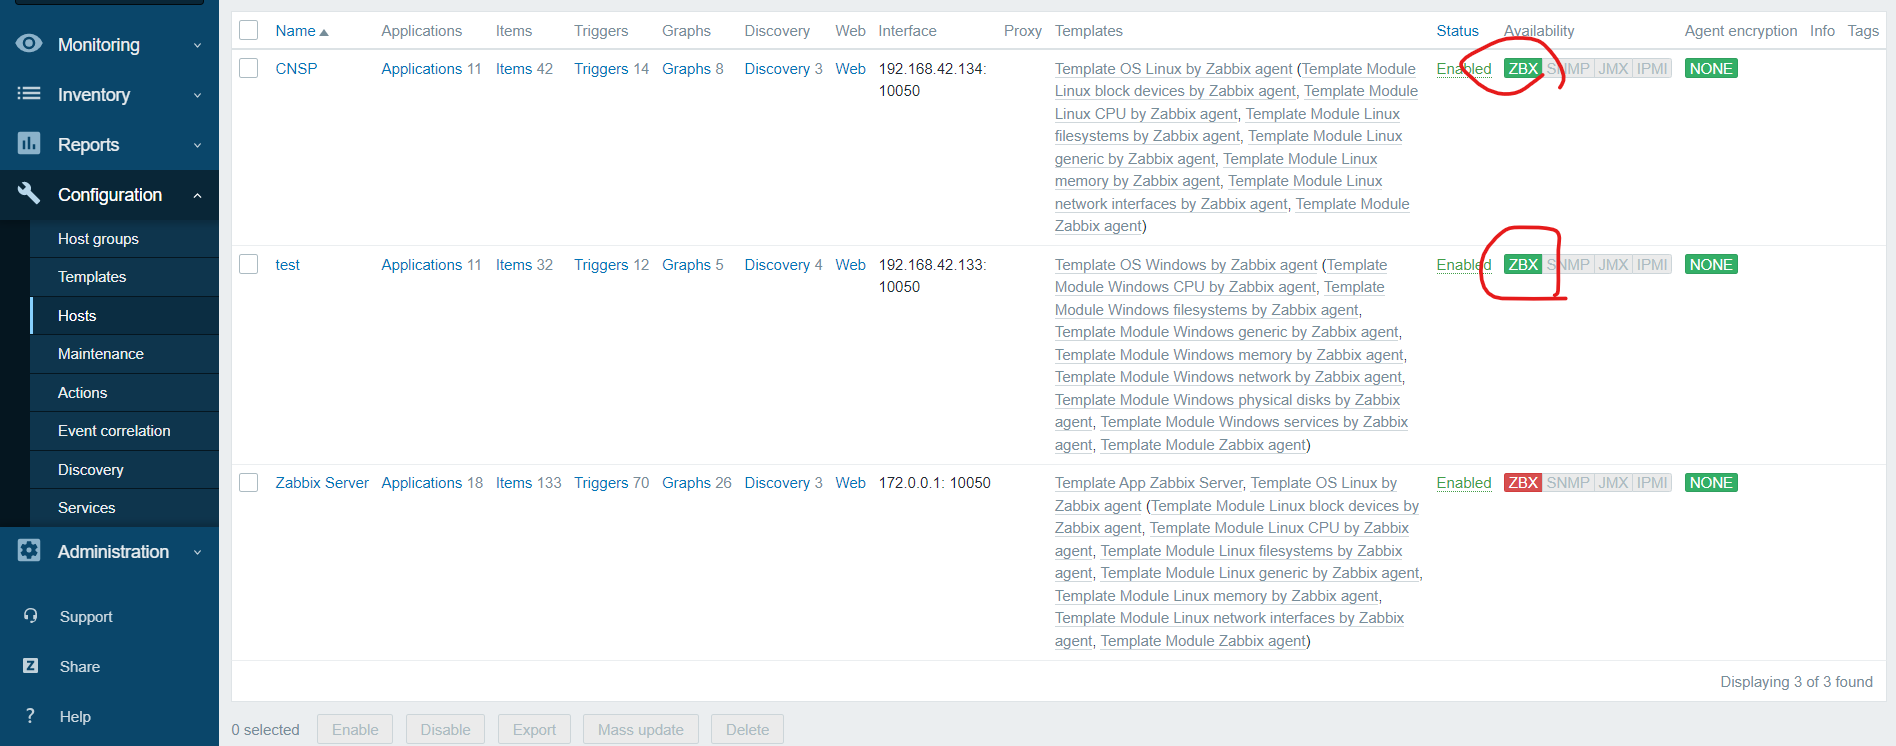
最後兩台都設立完畢就會看到下圖!
在server端上安裝手動測試client端的套件
$ yum install zabbix_get -y
$ zabbix_get -s 192.168.42.133 -p 10050 -k "system.hostname"  # 詢問client hostname